Pages

Showing posts with label Floral cards. Show all posts

Monday, 15 June 2020

Easel fold card made easy using Ornate layers die cuts.

I do love to create fancy folds but I sometimes find them a tad complicated. This idea helps you create an Easel fold card in any size using just shapes without the need for a full folded and scored card front. It simplifies the fold hugely.


Here is the pretty card I created using just die cuts from the Ornate layers set from Stampin' Up!. I created the easel fold by adding a small folding strip to the die cuts like so.


The principle here is the same no matter what you are using. You need 2" to anchor under the base of your creation, then add on the width measurement of your card so in my case my card base/ die cut is 3 7/8" so my total strip measurement is 5 7.8 x 2". You score at 2" as that is your anchor then simply fold the remaining length in half inwards creating a small triangle. After you glue the 2" part to the underside you then glue your top layer onto the BOTTOM half of the remaining strip and voila you have your easel mechanism and you can use it no matter what you are using for your front and base negating the need for a full card layer saving supplies and you scratching your head remembering adequate sizes.

I do have a full process YouTube tutorial which also has some colouring tips as my focal point is the beautiful rose for So Much Love stamp set which I hand coloured.

You can purchase any of the items used today by clicking the photograph links which will take you direct to my online store.


Happy stamping xx Amanda

Product List

Video tutorial


Thursday, 11 April 2019

Thanks for everything ...bright floral card

 I often say I am a subtles girl .. meaning I like softer colours. BUT ..... I do love the pretty vibrant colours in the Garden Impressions Designer series paper stack from Stampin' Up!. Super prety vibrant pattern which make card making so easy as you simply use the great paper as the focus for your card.


Pairng up the stunning blues and pinks in the paper with a hint of yellow makes for a great card where the colours simply pop right out...stunning. Adding those tiny flowers to one side takes the plian look away and makes the card look finished yet it still has minimal detail. The striking sentiment comes from All Things Thanks a great set with NINE statement sentiments each as awesome as the next.


So you see sometimes we have to step away from our comfort zones and really play with colours to see what we can achieve. I will just toot the horn for Stampin' Up! here because their colours all co ordinate. So you can see the colours in the paper and find that EXACT same colour in the card and the ink ... making matching up colours so easy that you spend less time choosing and more time creating.

I hope you enjoy this card today and will give bright bold colours a whirl ... remember the Garden Impressions paper from Stampin' Up! is a great place to start. 

As always you can find everything I used today listed below.

Have a fantastic day and .... happy stamping xxx Amanda

Product List

Thursday, 22 November 2018

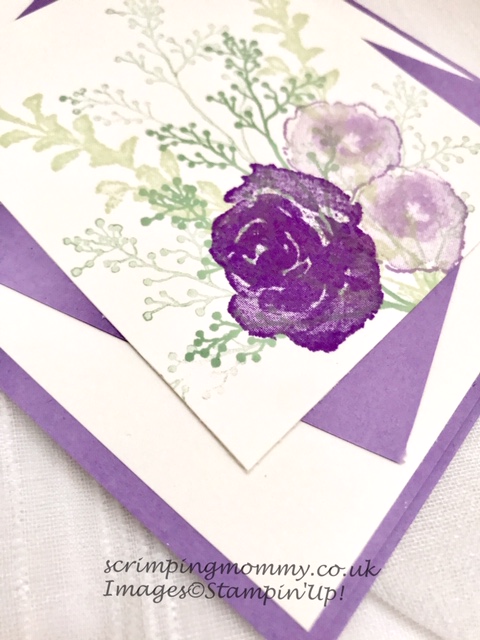
First Frost simple stamping #SIMPLESTAMPING


One realy great, yet simple stamping technique is layering...all this means is simply stamping colours on top of each other. Its a beautiful way for beginners to advance their stamping and the more skilled to realy shine through with their card making. Stamping here is made simple as we just have paper and ink ...clean and simple with no fuss. 


The only thing to think is to have lighter colours at the bottom of the layer and darker as your top. That way all the colours are still seen. Pick colours that compliment with one bold or striking colours as your focus. You will see my bolder colour here is Gorgeous grape in the larger flower. It realy is that simple Layering the card stock with a similar shade to your focus colour will make it stand out even more and realy help blend those colours nicely.

I hope you will give this card a try for yourself. I do have a quick fun YouTube video for you to watch and follow along to. All products used are listed below along with measurements. So go grab a brew, get comfy and enjoy the video.

Happy stamping xxx Amanda


Meausrements

Highland heather card base :- cut a4 sheet in half on shirt side at 4 1/8" then score st 5 7/8" fold to form base.
White layer 5 5/8" x 3 7/8".
White stamp layer 3 x 3 1/2".
Highland heather coloured layer 3 1/8 x 3 5/8".

Product List